
This is the second post about my new pet project - the Episerver Developer Console. In this post we'll learn how you can connect to the Developer Console from a local CLI on your own computer.
If you are new to the Developer Console, I recommend reading this post first: Introducing the DeveloperConsole for Episerver. You can also check out the project on GitHub here: https://github.com/CodeArtDK/CodeArt.Episerver.Console.
Since the developer console is purely a command based interface, there is really no need to use a browser at all. In fact, the browser might actually be just annoying factor. So - one of the pieces of the big puzzle is a thin console based client you can run locally - the DevConsoleCLI (yes - I know. Very inventive name - it might change later).
This basically let's you connect to your Episerver installation right from the comfort of your own local command prompt. It's running on .NET Core 3, so theoretically you should even be able to use it cross platform - from your mac or linux machine.
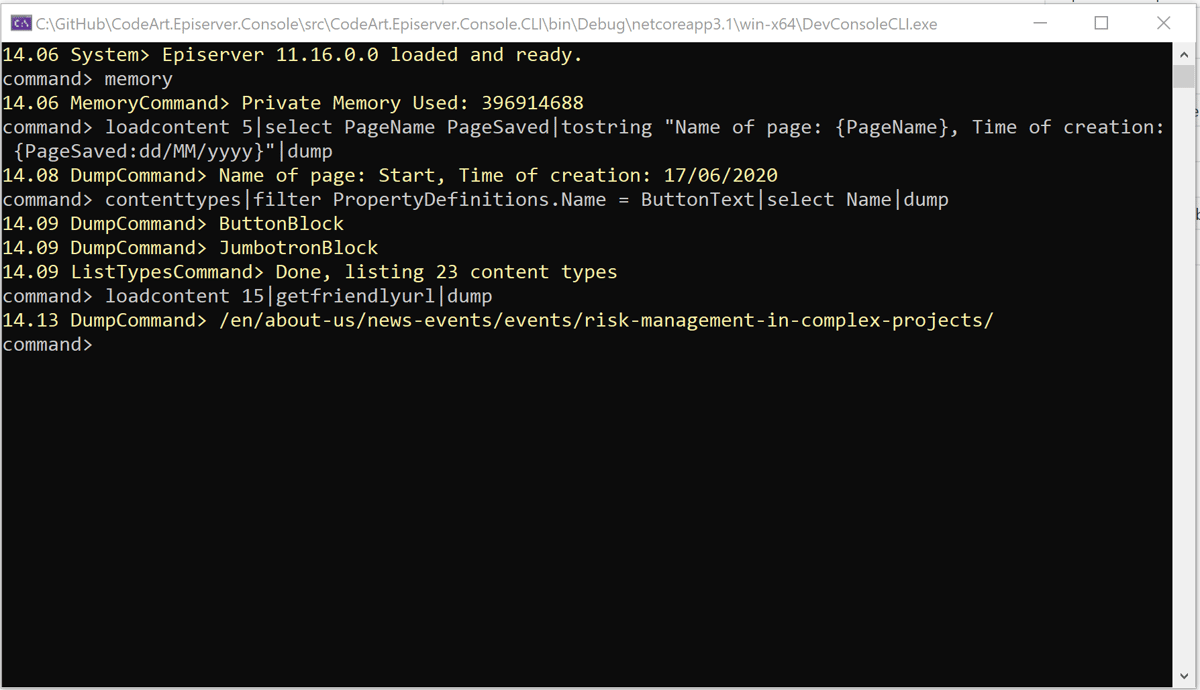
As you can see in the above screenshot you get the same functionality (and in the future maybe even more) than the webclient offers.
Connecting for the first time
In order to connect your local CLI with an Episerver site, you need to know the endpoint (url of site) and have an access token.
You can generate the access token in the Web console, using the command "createaccesstoken". This will return a token - make sure to copy it right away - as only a hashed version of it is stored in Episerver.
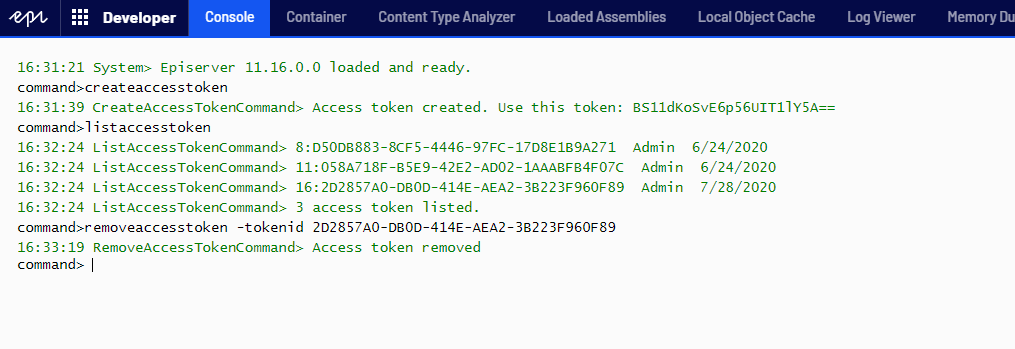
You can of course also see a list of access tokens created, as well as remove them using commands.
Then, you simply start your CLI like this:
DevConsoleCLI.exe http://localhost:61510/ [access token] [optional command line]If you simply want to execute 1 command string, you can append it after the first two parameters.
This can be useful for scripting - or perhaps setting up a cron/scheduler job.
Alternatively, you'll get a prompt much like in the web console.
Upload and Download
Now, that you are connected from your local computer - you might wonder - what if I want to further connectivity between my local system and the Episerver instance?
To support that, we've added two new commands: Download and Upload.
Download will take whatever data is piped to it and create a file that will be downloaded. If you are using the Web console, it will be an inline attachment, and if you are using the CLI the file will be put in your working directory.
Consider this command:
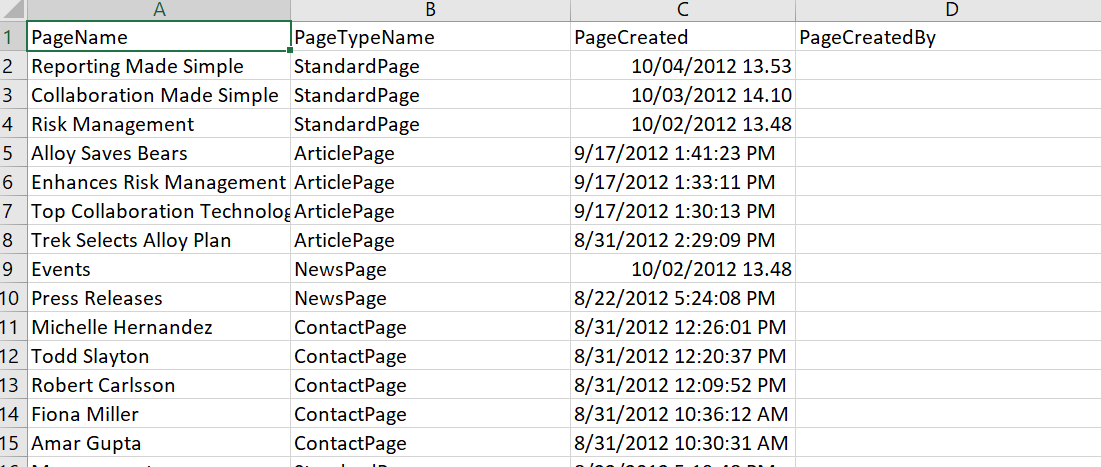
listdescendents 5|select PageName PageTypeName PageCreated PageCreatedBy|tocsv|download -filename "pages.csv"
That will list all descendents from page with ID 5, select several fields from them, convert it to CSV and download it as a file called "pages.csv". On my local Alloy it provides me with something that looks like this:
Of course there are also commands to return data as Json - and more are to come.
Upload can only appear as the first command in a command line, and it currently only works in the CLI. Currently it's still pretty simple - it takes 1 parameter: the filepath of the local file. It will then upload it and pass it along in the pipe-stream. Not very useful yet, but one of the goals we are working towards is a scenario where you could upload a CSV and have it piped on to the "createcontent" command to create multiple content items at once.
There are also many other new commands available - some working better than others - remember, this is still experimental and should not be used in production.
Download the latest CLI client from here.