.NET Core is cross platform. But can you really run Optimizely CMS 12 and everything needed on a tiny ARM based Raspberry PI? Yes you can, and it's not that hard.
I love gadgets - and especially cool mini computers like the Raspberry Pi. I've had multiple - but as it often goes with many gadget toys, they end up in a drawer somewhere after you are done playing with them.
Currently I'm playing with some home automation, MQTT and the likes - and got one of my old PI's running again to act as a Mosquitto MQTT broker (long story involving trying to optimize a panasonic heat pump - drop me a comment if I should blog my experiences on that topic).
Anyway - now that it was running again, I got inspired to do something that I've wanted to do for ages, but never came around to - run Optimizely (Episerver) CMS 12 on .NET 6 on a raspberry Pi. I've tried in the past but hit a few hurdles when it came to running the database on the PI as well. But now I had learned from my mistakes and it turned out to be a lot easier than I thought.
I knew it can be done to run it on Linux - that's done daily by many clients in Azure - and there are several posts like this that shows how to run it on a mac.
Here I'll document the steps I took to get it all working - it was a lot easier than I would have thought.
Step 1: Prepare the Raspberry PI
Typically Raspberry PI's are used with the Raspberian variant of Linux. However, that is a problem for this use case, as it's only 32-bit, and to run a docker with a usable variant of SQL Server on an ARM processor like the PI, you need 64 bit support.
However, it's easily fixed. Basically I went to https://www.raspberrypi.com/software/, got the Imager for windows. The tricky part was then to dig through all my gadgets to figure out where I put the adaptor for MicroSD, so I could plug it into the laptop with Imager. After I found it, it took around 10 min and I had installed a 64-bit version of Ubuntu for Raspberry PI on the SD card which could then be re-inserted in the PI and it started up.
After getting the PI connected to my WIFI and using my Router LAN overview to figure out which IP it has, I could then use Putty (my all time favorite telnet/SSH tool) to SSH to the PI and do everything else through there.
Next, it was time to make sure the PI was upgraded and fit for fight:
sudo apt-get upgrade
sudo apt-get update
Prepare SQL Server through Docker
Now it was time to get SQL Server running. But first we'll need to install Docker:
curl -fsSL https://get.docker.com -o get-docker.sh
sudo sh get-docker.sh
And of course make sure the 'ubuntu' user I was using was in the docker users group:
sudo usermod -aG docker ubuntu
To verify the install, I'd check the version of docker like this:
docker version
All working and ready? Then we should install Azure SQL Edge (Developer) on our docker:
sudo docker pull mcr.microsoft.com/azure-sql-edge:latest
The above gets the image, now we just need to instantiate it:
sudo docker run --cap-add SYS_PTRACE -e 'ACCEPT_EULA=1' -e 'MSSQL_SA_PASSWORD=MySecretSAPassword' -p 1433:1433 --name azuresqledge -d mcr.microsoft.com/azure-sql-edge
(Some of the steps above can also be found in this great guide I partially followed: https://hevodata.com/learn/sql-server-on-raspberry-pi/)
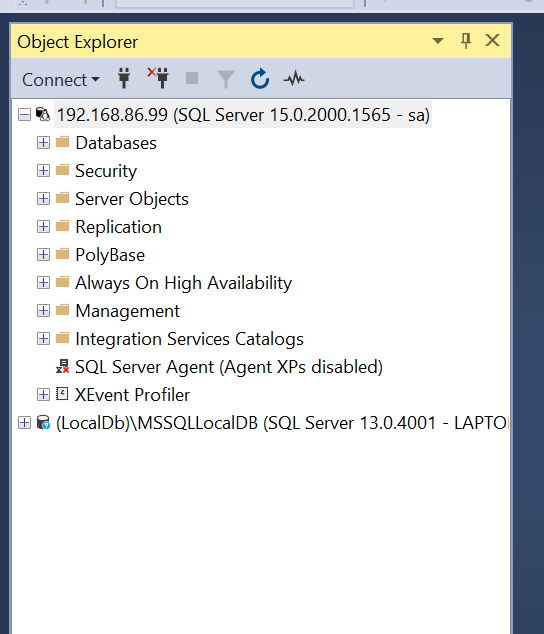
To verify that the database worked, I opened my local SQL Server Management Studio and connected to it using the IP to the PI and the SA password (as this is all local and for testing I'm not too concerned with security here, so this POC doesn't follow best practices in that regard).
Creating the database and trying it on the PI
My next step was to create a local Alloy sample site, and see if I could run it with a database remotely on the new SQL Server instance on my Raspberry PI.
On my local windows pc, I created a new project, as always using:
dotnet new epi-alloy-mvc --name RaspEpi
And then opened it in Visual Studio. Updated the nuget packages to the latest version, ran the site and created an Admin user.
Next, I connected to the LocalDB through SQL Server Management Studio and exported the newly created database to a .bacpac (Export Data-tier application) and then imported it using SSMS to the Raspberry database.
After quickly changing the connection string in my local project I verified that it ran great using my new database server (as expected).
Install .NET 6 on the Raspberry PI
Again, logging in through Putty, now the time had come to get .NET 6 running on my PI.
Prepare Alloy project for deployment
The proper way to host a CMS on linux is probably to install a decent web-server, maybe apache or nginx, and install whatever is needed to run asp.net core on it and then host it from there. But since I have no intention of hosting a production site on my raspberry pi for now (albeit I probably could with decent performance) - I'm going for the quick and dirty approach. And luckily an asp.net website like Alloy comes bootstrapped with it's very own built-in webserver, Kestrel.
This means that essentially all I have to do is basically to publish my project, move the files to the PI and run them!
But first, there's a few things to check:
- Database connection string. It can also be set in the publish settings - and since I've just been using it, pointed at the right server, all I have to do now is just to move it from my development settings to my main settings.
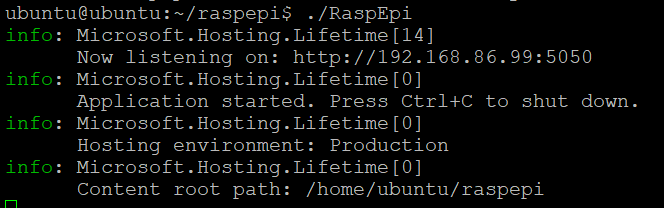
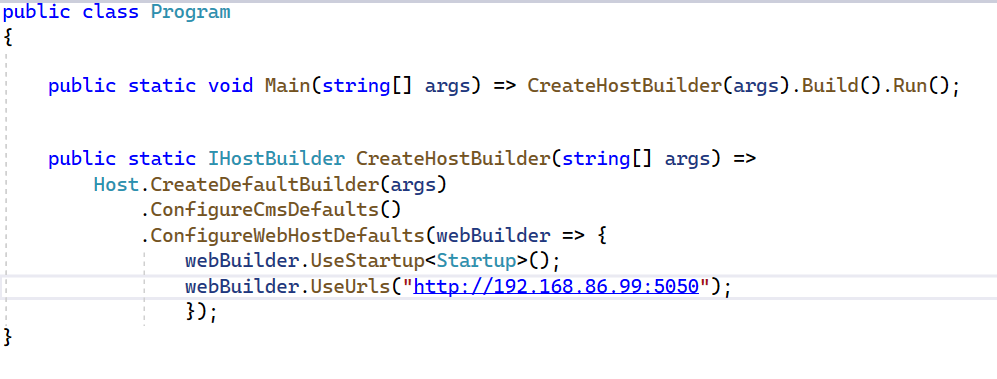
- By default, the site is set to run on http://localhost:5000. Technically that would be fine, but I'd also like to access it from another host - like http://[my-pi's-IP]:[some port]. This can easily be achieved in program.cs, by adding a hosting url programmatically.
- If we want to use locally stored blobs (in App_Data like we are used to), then we need to go to StartUp.cs and ensure that AppData is registered as a folder (by default it's only setup for development environments). But that's easy - it's just a matter of moving 1 line outside of an if-statement.
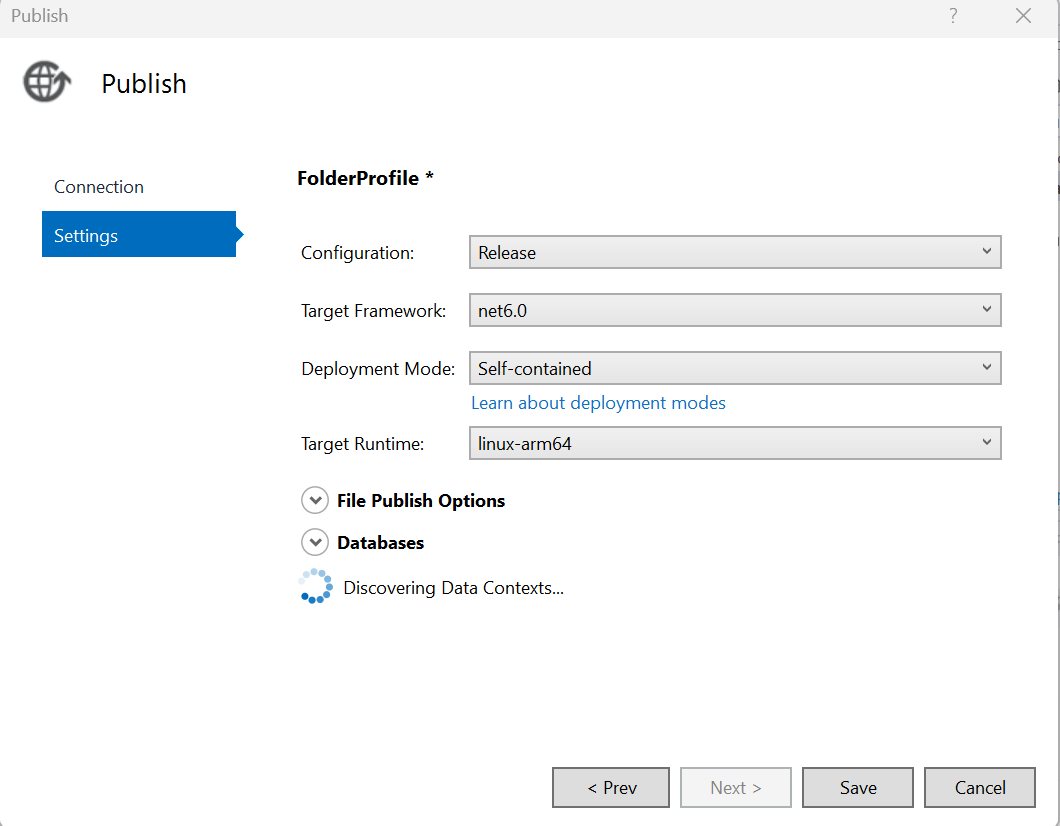
With these changes done, we can go ahead and publish to a folder from visual studio. It's important to configure the application to be 'self-contained' and targetting 'linux-arm64'.
Moment of truth
Finally, we are ready to upload our solution to the PI! The easiest approach to use a tool like WinSCP - it will even fetch your Putty stored servers, so connection is super easy.
I simply created a folder below my current users home, called 'RaspEpi' and used WinSCP to upload all the files from the publish folder to there.
I also copied the 'App_Data\Blobs' folder there (in the same structure, 'RaspEpi/App_Data/Blobs').
After all files were copied, I used Putty again and cd'ed into the 'RaspEpi' folder so I could make the main file executable, and then run it: